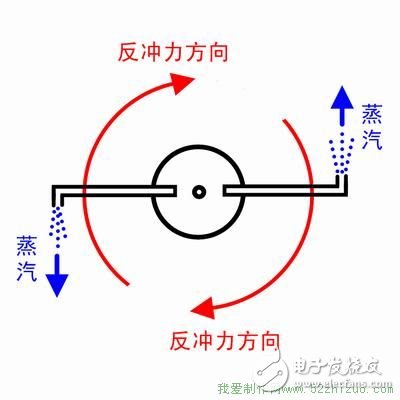
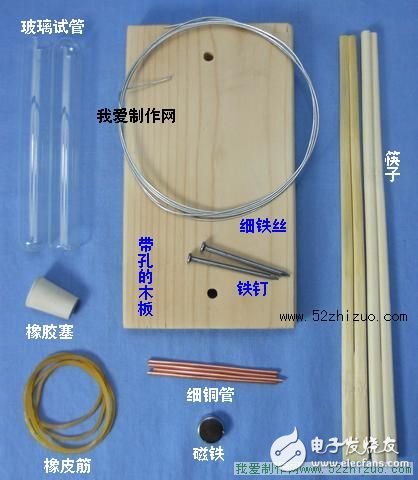
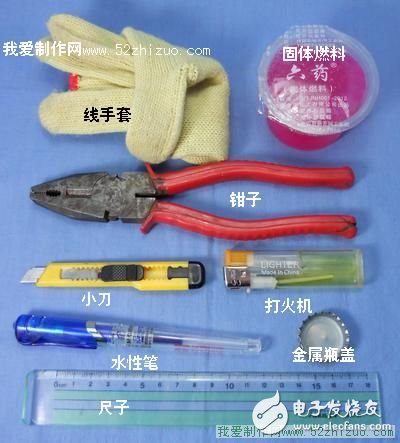
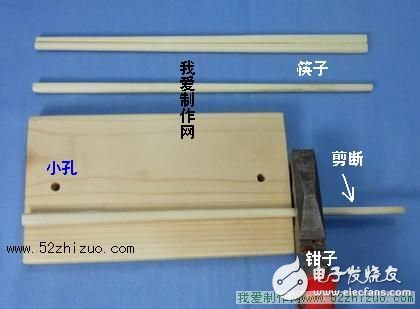
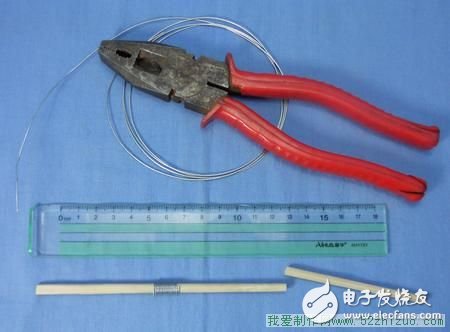
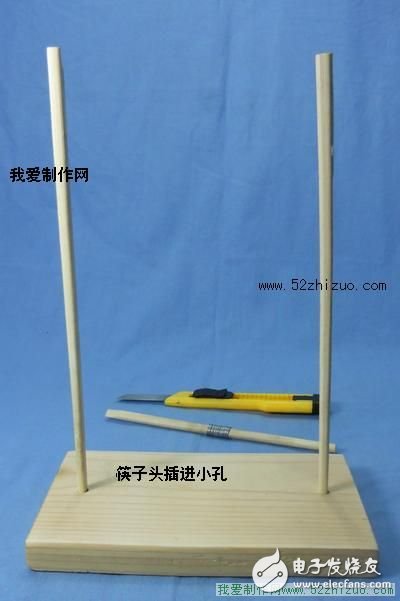
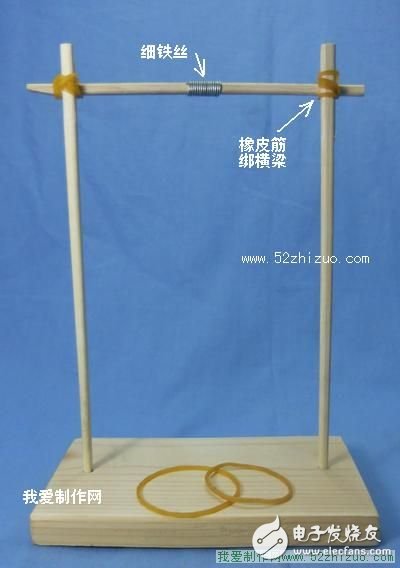
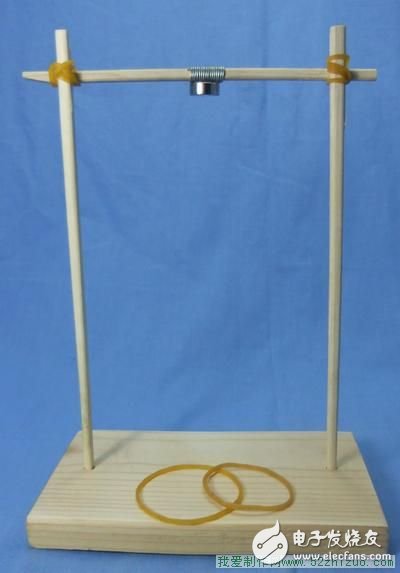
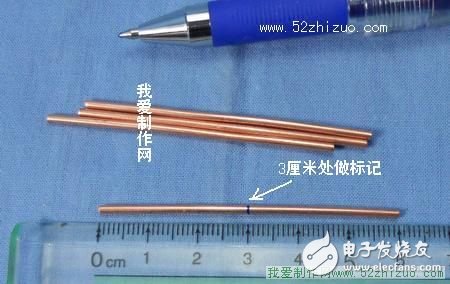
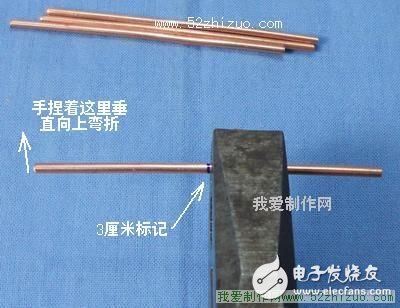
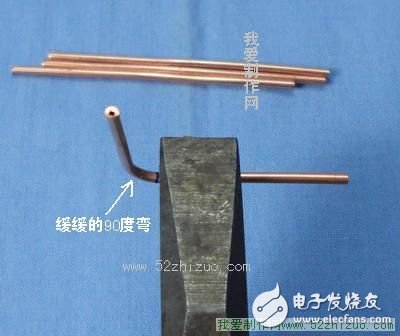
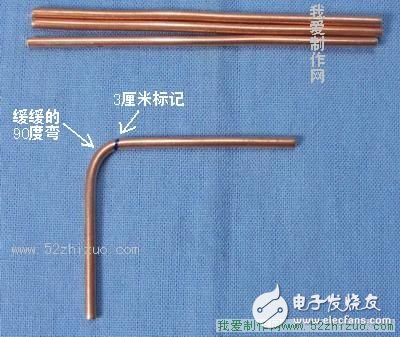
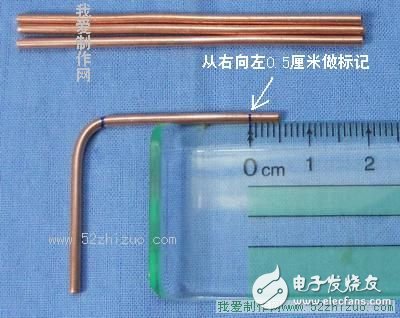
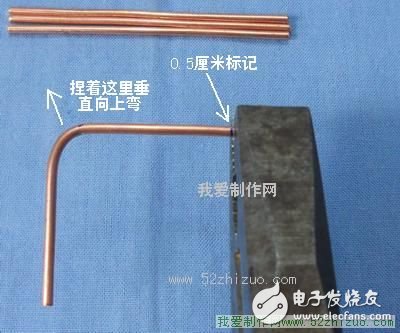
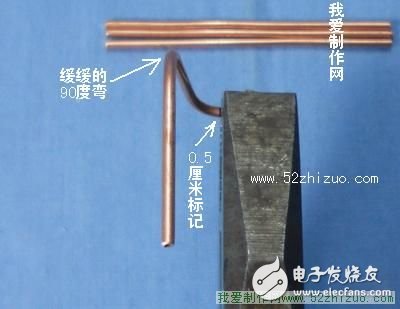
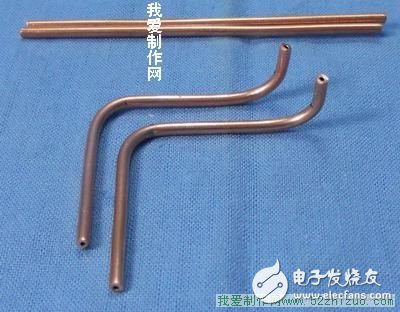
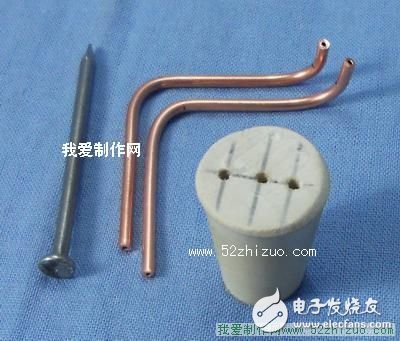
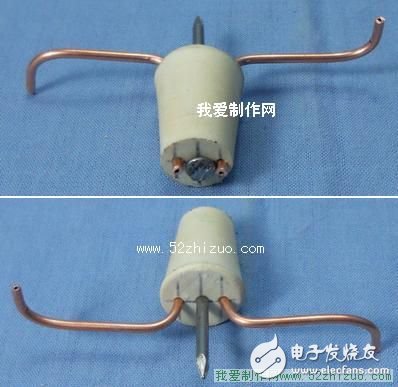
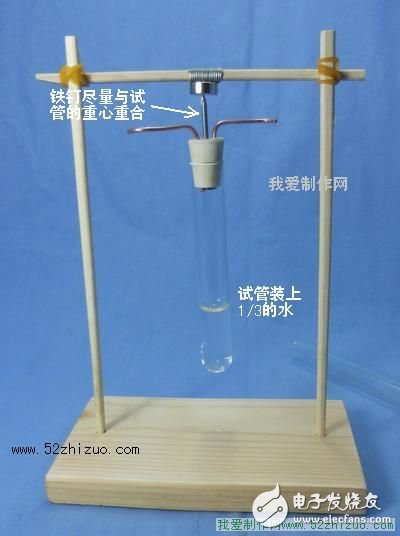
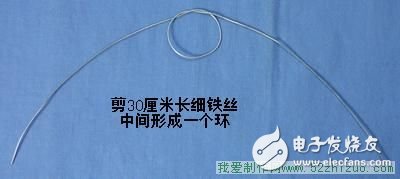
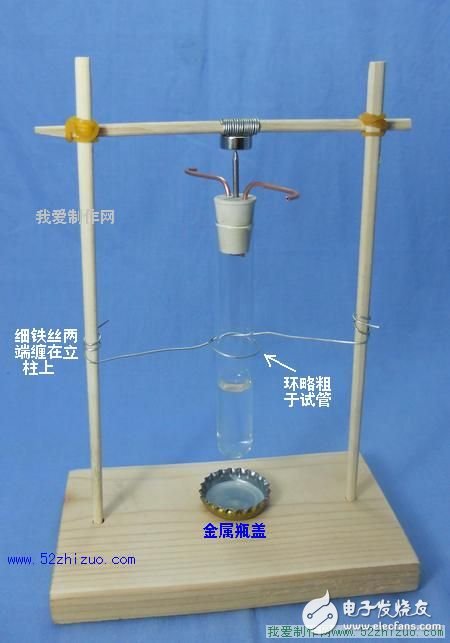
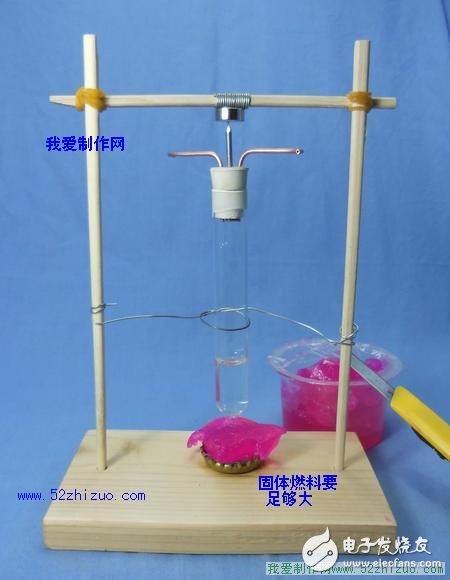
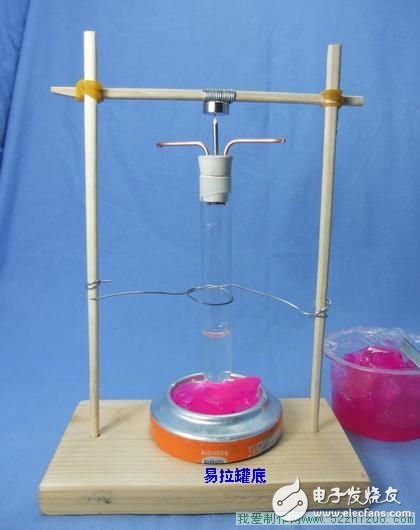
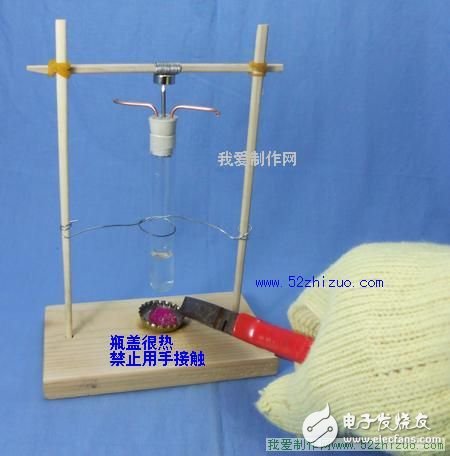
The Siren steam engine was invented by the ancient Greek Siren more than 2,000 years ago. It uses the reaction force of high-speed steam to propel the machine to rotate. We use simple materials such as test tubes, thin copper tubes, and magnets to replicate a model of a Siren steam engine. Through clever design, you can use hand tools to create a working machine at home. Below is the full picture of the Siren steam engine we are going to make. There is a thin copper tube on the rubber plug of the test tube, which is attracted to the magnet by iron nails. The solid fuel under the test tube makes the water boil, and the water vapor is ejected through the thin copper tube, pushing the test tube to rotate. Because the rotation resistance of the magnet attracting the nail is very small, it can make the test tube rotate at a high speed even though the driving force is weak. The following is the schematic diagram, pay attention to the shape of the thin copper tube, the recoil force makes the steam engine start to rotate. The materials included in the kit are: Test tubes, rubber plugs with holes, wooden bases with holes, thin iron wires, iron nails, chopsticks, rubber bands, thin copper tubes, magnets, a total of 9 types. The materials and tools you need to prepare are: Pliers, knife, water-based pen (or pencil), lighter, metal bottle cap, ruler, solid fuel, thread gloves (optional) Production steps: Let's make the bracket part first. 1. Use pliers or a knife to cut off a part of the thin end of a chopstick so that it is as long as the wooden board; 2. Use a ruler to measure out a 30 cm long thin iron wire, and use pliers to pinch it off. Wrap the thin iron wire around the middle of the chopsticks. The beams of the bracket are made above; 3. Insert the two chopstick heads into the small holes at both ends of the board. If the chopsticks are too thick, use a knife to trim them slightly, if the hole is too big, put a little piece of paper; 4. Use rubber bands to tie the beams to the uprights; 5. Suction the magnet on the thin iron wire in the middle of the beam; At this point, the bracket part is completed. Let's make the rubber plug part. 1. Take a thin copper tube, measure 3 cm from left to right with a ruler, and mark with a water-based pen (or pencil); 2. Hold the pliers in your right hand and gently clamp it at the marked position, leaving a 3 cm long thin copper tube on the left side of the pliers; 3. Pinch the leftmost end of the copper tube with your left hand, and slowly bend it upwards until the copper tube is vertical; 4. Pay attention to this gentle 90 degree angle, because if you bend too sharply, it will block the copper pipe; 5. At the other end of the copper pipe, use a straightedge to measure the length of 0.5 cm from right to left, and mark with a pen; 6. Gently pinch the marked position with pliers with your right hand, and slowly bend the rest of the copper pipe upward with your left hand; 7. Also get a gentle 90 degree bend; 8. Make two copper pipes of this kind and compare them after completion. The areas with large gaps can be trimmed appropriately to make them basically the same; 9. Insert two bent copper tubes and an iron nail into the small hole of the rubber plug; 10. After the copper pipe is inserted into the rubber plug, blow it with your mouth to see if it is blocked; Here the rubber plug part is finished. Now begin to assemble the Hillen steam engine. 1. Fill the test tube with 1/3 of the water, plug the rubber plug tightly, and attract the tip of the iron nail to the magnet. Adjust the level of the magnet and the angle of the iron nail to achieve a state where the test tube can be rotated many times steadily by gently turning the test tube by hand. 2. Measure out a 30 cm long thin iron wire and clamp it off with pliers. Tie a slipknot in the middle of the wire, leaving a ring; 3. The iron wire ring is sleeved in the middle of the test tube, slightly larger than the diameter of the test tube, and the two ends are respectively wrapped around the column; The wire ring should not be in contact with the test tube. Its function is to prevent the test tube from falling off the table and breaking. A metal bottle cap is placed directly under the test tube, and the Siren steam engine is assembled. Ignite and run the Hillen steam engine. Cut a larger piece of solid fuel with a small knife, place it on the metal bottle cap, adjust the height of the beam so that the bottom of the test tube is close to the solid fuel, and ignite it with a lighter. After the water in the test tube boils violently, there will be steam from the thin copper tube. The end sprayed out, and the test tube slowly began to spin. If you don’t drink, you can get a lot of beer bottle caps from drinkers or food stalls. You can also use the bottom of a can, a tin box of egg tarts, or other small metal containers for fuel. Notes on fuel: 1. It is recommended to use this solid alcohol block fuel, which is sold in general grocery stores. It is used for hot pot, and it costs 1, 2 yuan per piece; 2. The alcohol block under the test tube must be large enough and the flame is fierce enough to make the water in the test tube boil vigorously, and the water vapor sprays from the thin copper tube with a "hissing" sound to drive the test tube to rotate. The Siren steam engine you made doesn’t work. It’s very likely that the fire is not big enough. 3. You can also use a cotton ball or toilet paper ball and pour liquid alcohol as fuel. However, the use of liquid alcohol must follow the laboratory operating procedures. A parent responded to me that his child poured alcohol directly on the burning cotton ball from a bottle, which may cause an explosion! Therefore, we do not recommend the use of liquid alcohol unless you have professional qualifications. 4. It is not suitable to use candles as fuel, because candles will blacken the test tube and make you unable to see the boiling water inside; Danger warning: Burn warning! The steam from the copper pipe is very hot, so please wear long-sleeved clothes to operate! The burned metal bottle cap and test tube are very hot, please do not touch them directly with your hands. When the water in the test tube is about to boil out, you can use pliers to remove the cap and wear wire gloves. Fire warning: Please use the fuel safely according to the recommendations. When you want to extinguish the fuel in the bottle cap, first take it to a stone or metal surface with pliers, hold it upside down with a cup, and wait for the fuel to be completely extinguished before processing. Cut warning: Handle the glass test tube gently to prevent it from breaking. Do not use excessive force when inserting the rubber stopper into the test tube to avoid breaking the test tube. If the test tube breaks, please handle the broken glass carefully to avoid cuts. Strong magnetic warning: We use high-strength magnets. Please stay away from large iron objects to avoid pinching your fingers when the magnet is attracted; stay away from magnetic cards, watches, cameras and other devices that may be damaged by magnetism.
Custom Wire Harness Assembly
Custom Wiring Harness,Wiring Harness,Cable Assemblies,Wire Harness,Wire Harness Assembly Manufacturer ETOP WIREHARNESS LIMITED , https://www.etopwireharness.com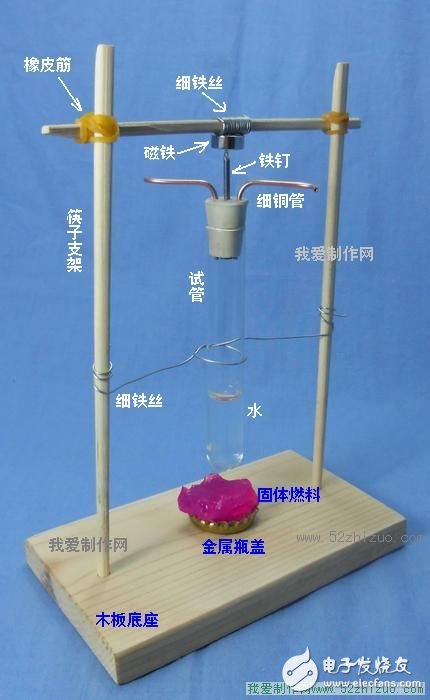
![]()
