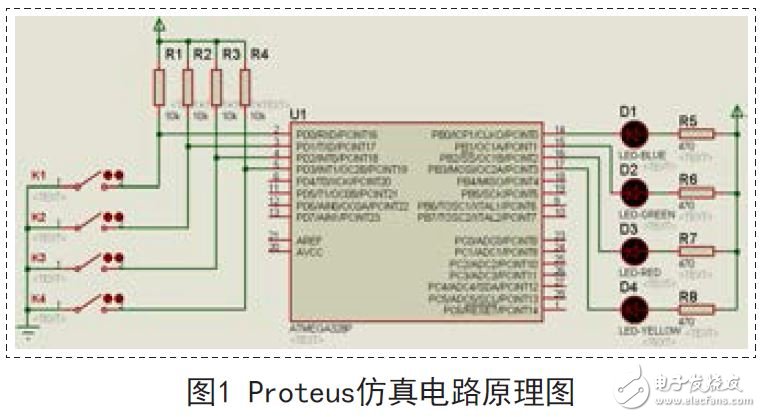
Arduino is a convenient, flexible and easy-to-use open source electronic prototyping platform. It has the advantages of rich interface, simple programming environment, large degree of freedom and strong expandability. It is based on the AVR platform, and the AVR library is compiled and packaged twice. The underlying code of the complex MCU is packaged into a simple and practical function, so that the user does not care about the cumbersome details of the MCU programming, such as registers, address pointers, etc., which greatly reduces the development difficulty of the MCU system, especially suitable for teachers, students and some amateurs. Used by enthusiasts. Since Arduino users are generally beginners who do not know much about circuit knowledge, electronic technology and single-chip technology, how to quickly and effectively improve their microcontroller system development capabilities and electronic circuit design capabilities in the Arduino development process is an urgent need. solved problem. The introduction of Proteus better solved the existing problems. Proteus is a circuit analysis and physical simulation software. In addition to basic electronic circuit simulation, it can also directly program the MCU on the microcontroller virtual system. The application of Proteus virtual development technology has formed a new Arduino system development concept. The system development process is: circuit design and simulation - circuit modification and improvement - drawing PCB and generating PCB 3D renderings - hardware assembly and debugging, breaking The traditional system design mode makes Arduino users expose system design defects to the initial stage of design, overcoming the shortcomings caused by the continuous modification of the soldering circuit in the design. In addition, the three-dimensional rendering of the PCB makes the component symbol and the actual package image. Bring a strong sensory understanding to beginners, thus deepening their understanding of the design of the microcontroller system. The following is an example of controlling the state of four different color LEDs with four buttons, and introduces the method of applying Proteus to design the Arduino virtual system. 2.1 Proteus simulation circuit drawing Drawing a schematic in Proteus ISIS is mainly divided into the following three steps: (1) New design: In the Proteus ISIS development environment, click “File - New Designâ€, select one of the design templates in the opened dialog box. In this paper, select the LandscapeA4 template, and then open a Proteus workspace to save the design. . (2) Component selection and placement: first select the component, click the button on the left side of the window, input the name of the component to be searched in the text bar in the upper left corner of the pop-up PICk Devices interface, such as ATMEGA328P, select the searched component, repeat the operation. Add all the components required by the system to the component list area; secondly, place the components, select the components in the component list area in turn, click the left mouse button to place the device into the drawing area, and set the parameters. (3) Layout and routing: After all components are properly laid out, click the button to connect; when connecting, when the mouse pointer is close to the pin of an object, the mouse can automatically capture the node and a node appears. Center the red square, click the left mouse button to connect, click the right mouse button to cancel the operation. According to the above steps, the hardware schematic drawn by Proteus ISIS is shown in Figure 1. Phone Accessories,Smartphone Holder,Cell Phone Stand Holder,Adjustable Stand Holder Shaoxing Shangyu Kenuo Photographic Equipment Factory , https://www.kernelphoto.com
1 Introduction